|
CNC Your Own Parts |
|
|
A year or so ago, I was trying to figure out how I was going to make a part for my Connie. The only way it was going to happen was it had to be a custom CNC job. Figuring that about the only thing that people don't do in their basements these days is build atomic bombs (yet), I Googled something like "CNC home" and found a ton of hits. Guys were retrofitting cheap Chinese mills and building their own CNC routers. There is also a surprising amount of cheap software out there. I was hooked. The electronics adventure meant not only learning what I needed and what components worked together but then I needed to learn how to assemble it all. And then to design parts, I need Cad software. And then there was the Cam software to create the tool paths, and the machine control software to control the electronics and the mill. But by the time I learned that out, it was too late. I had too many ideas on what I wanted to make and how to do it. The learning curve was steep but oh boy it was rewarding. |
|
| I gutted an old computer and assembled various parts I found through the internet. |

|
|
|
|
| Once I got things figured out, the first "real" project that came along was local Connie owner Ken Bergen's need for some light brackets. He like the one's that Guy Young had on his web site. I downloaded Guy's drawing and used a dandy little utility program to convert the Gif file to Dxf format which the Cad program could understand. Then a bit of cleanup time and onto the next step. |

|
|
|
|
|
I retrofitted a little Sherline 2000 desktop mill. With this setup, I
can built my own parts for Mill V 2.0 . There are lots of Sherline mills
on Ebay for $500 or so.
After a trip to the local scrap yard for a bit of aluminum it was time to apply some of my new found knowledge. I've always liked engine turned aluminum panels. Like the nose of the Spirit of St. Louis or old Dusenberg dashes or firewalls. I made a mandrel on the lathe and a few secret ingredients later I was set. I created a drill pattern in the Cad program, on to the Cam to set the "drilling" sequence, and then to the machine controller with the G-code and we were off.... Once I realized that nothing was going to blow up or go kamikaze, I went up to the kitchen and warmed up a bit of dinner while she hummed away.. |

|
|
|
|
| Ok, so you might say to just leave it on the Duzzie or perhaps a Harley. But, it was an experiment after all. If Ken doesn't like it he's going to powder coat it anyway. But I'd bet if you tried to buy this stuff it wouldn't be cheap. |

|
|
|
|
| Here's the Cam software creating the tool path. |

|
|
|
|
|
The tool path was fed into the machine control software next.
This is when you get nervous as a newbie. Did I set everything up just right ? All the clamps tight? Here, it's cutting the first slot for the mounting bolts. The bolts are .24inch in diameter so I just told the Cam program to use a 1/4" end mill and center cut a straight line. So far, so good. |

|
|
|
|
|
The next path to run was for the outline of the part. These little
Sherline mills aren't big industrial jobs although the quality is first
rate. You have to take light passes and don't be in a hurry. I sure
wouldn't want to spend 2 hours building $20 light brackets for a living.
Once around the track, I'm still within the material boundaries and I haven't collided with anything hard so I can go get dessert while this little sucker earns his keep. |

|
|
|
|
| Here's the machine control software churning away at the G-code. The G-code which provides the machine which coordinates to go to is on the left. The black window, slightly blinded by the camera flash shows the tool path. The digital readout for the X, Y and Z axes are above the tool path. |

|
|
|
|
| Coming round the half way turn on the last lap |

|
|
|
|
| And there you have it. Now if only I can get up enough nerve to bend the damn thing so it actually supports a light. |

|
|
|
|
|
The wiring and bolts need a little attention, but you get the idea. |
|

|

|
|
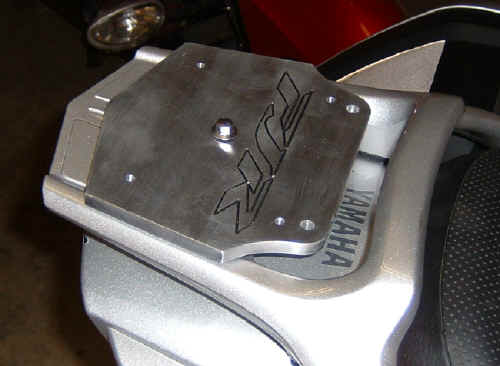
This is a GMRS radio mount for the FJR. The mount worked great. The
radio didn't work worth shit.
|
|
| An iPod mount that I designed & made for a friend |

|
|
The plate for my second auxiliary fuel tank |
|
|
This is not a way to make a lot of money in your spare time. But, if you want to learn a new skill, and invest some money, you can have a whole lot of fun. And, your imagination is the limit on what you can build. This is the most rewarding learning experience I've had in years. See what else you can make with one of these little machines |
|
|
Updated: October 18, 2008 |
|